Sunday, January 12, 2014

DIY Personalized Running Medal/Bib Holder


HAPPY NEW YEAR!!

For quite some time now I have been wanting to find a proper home for my race ribs and medals. Over the past two years my bibs have been tacked onto our kitchen bulletin board and my medals have overtaken all three of our key hooks. I asked my hubby for a medal holder from Etsy for Christmas, but when it came time to actually pick one, I decided it would be cheaper to make my own. I also thought that a medal/bib holder would be a great gift and motivator for two of my friends who have joined the half marathon band-wagon and are flying thousands of miles to join me for our second half marathon as a group--this time the Tinkerbell Half Marathon at Disneyland.

Supply List (Items found at Michael's and Home Depot):
Wood Plaque $14.99 8.99 with 40% off coupon
Acrylic Paint $1.39
Picture Hangers (pack of 3) $1.99
Square Bend Hooks #108 (pack of 3) $1.18 x2
Square Bend Hooks #112 (pack of 3) $1.18 x4--->this number can differ depending on how many hooks you want or need
_______________________________________
Total Cost: $20+tax. (Most Etsy holders go for $40 and up!)

Other supplies already on hand:
Foam brush
Modge Podge
Cricut vinyl with transfer tape
Hammer
Drill
Pencil, ruler, measuring tape
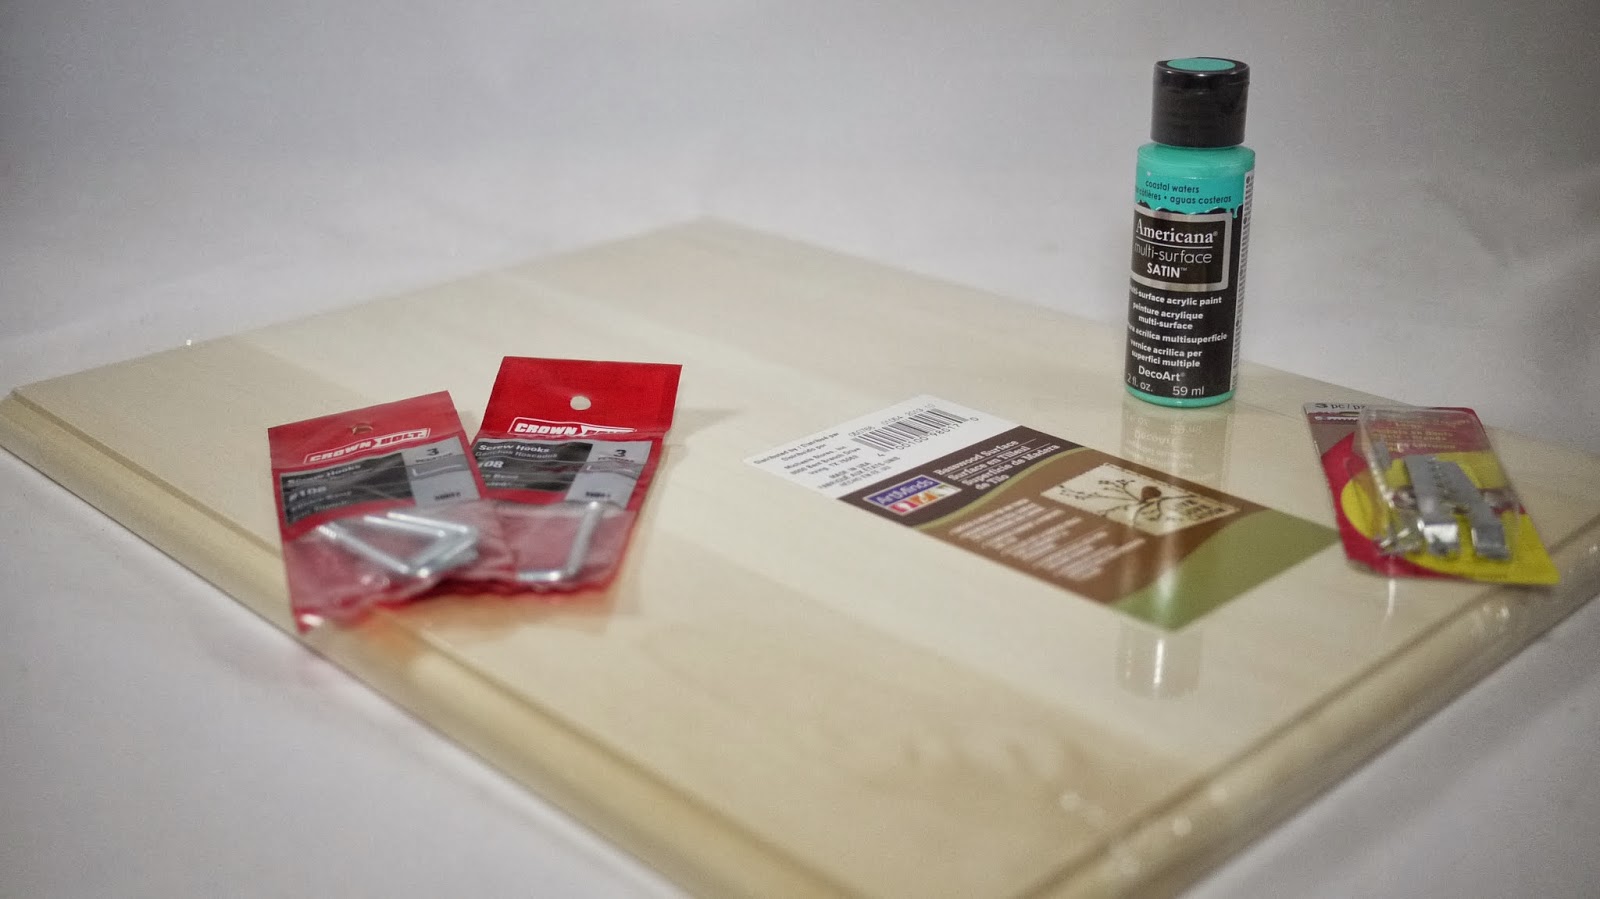


I bought two sizes of square bend hooks--I couldn't find the measurements for the hooks, but #108 were the larger hooks, and #112 were the smallest hooks. FYI-you'll find these in the section where cup hooks are located too.


Steps:

1. Paint board with acrylic paint in the color of your choice. I went with teal (of course), and my friends chose to have holders in the colors of their race fairy costumes. Each plaque only needed two coats. Let dry.

2. Create vinyl saying cut-out using Cricut machine. My saying from Robert Frost's poem for some reason was just stuck in my head--and so far no other medal holder I've seen has used it! I played with different fonts for each of the 3 sayings. If you don't have a Cricut machine you can easily use stencils and acrylic paint in another color or even sticker letters. Apply vinyl saying using transfer tape.


Eyeballing where to place my saying before taking the plunge...


3. Mark holes for bibs and for medals. For my bibs I created two sets of holes, since my bibs come in two different sizes. I used the holes from an actual bib to mark onto the wood where the hooks would go. To mark where the medal hooks go I had to use my ruler multiple times to make sure the holes were evenly spaced and straight. I created 11 holes for my holder, and 5 holes for my friends' holders.

4. Use drill to create holes for the hook screws (super easy once I got over my fear of this power tool!).

5. Apply a layer of Modge Podge over entire plaque and let dry. I've never used vinyl before on wood, so I just wanted to make sure the letters never come off. I also liked the little bit of shine Modge Podge gives, since the acrylic paint had no shine--even though it said "Satin Finish."

6. Screw in hooks manually.

7. Flip plaque over and nail in picture hangers. I used two for each, since the medals and the plaque can get pretty heavy.

8. Hang bibs and medals. Preferably, hang plaque as well--though I still have yet to find the perfect spot for it in our house.

9. Admire, and think about the next medal which will soon be added!

Didn't these turn out great? And I know for a fact there are no others out there exactly like them!!!


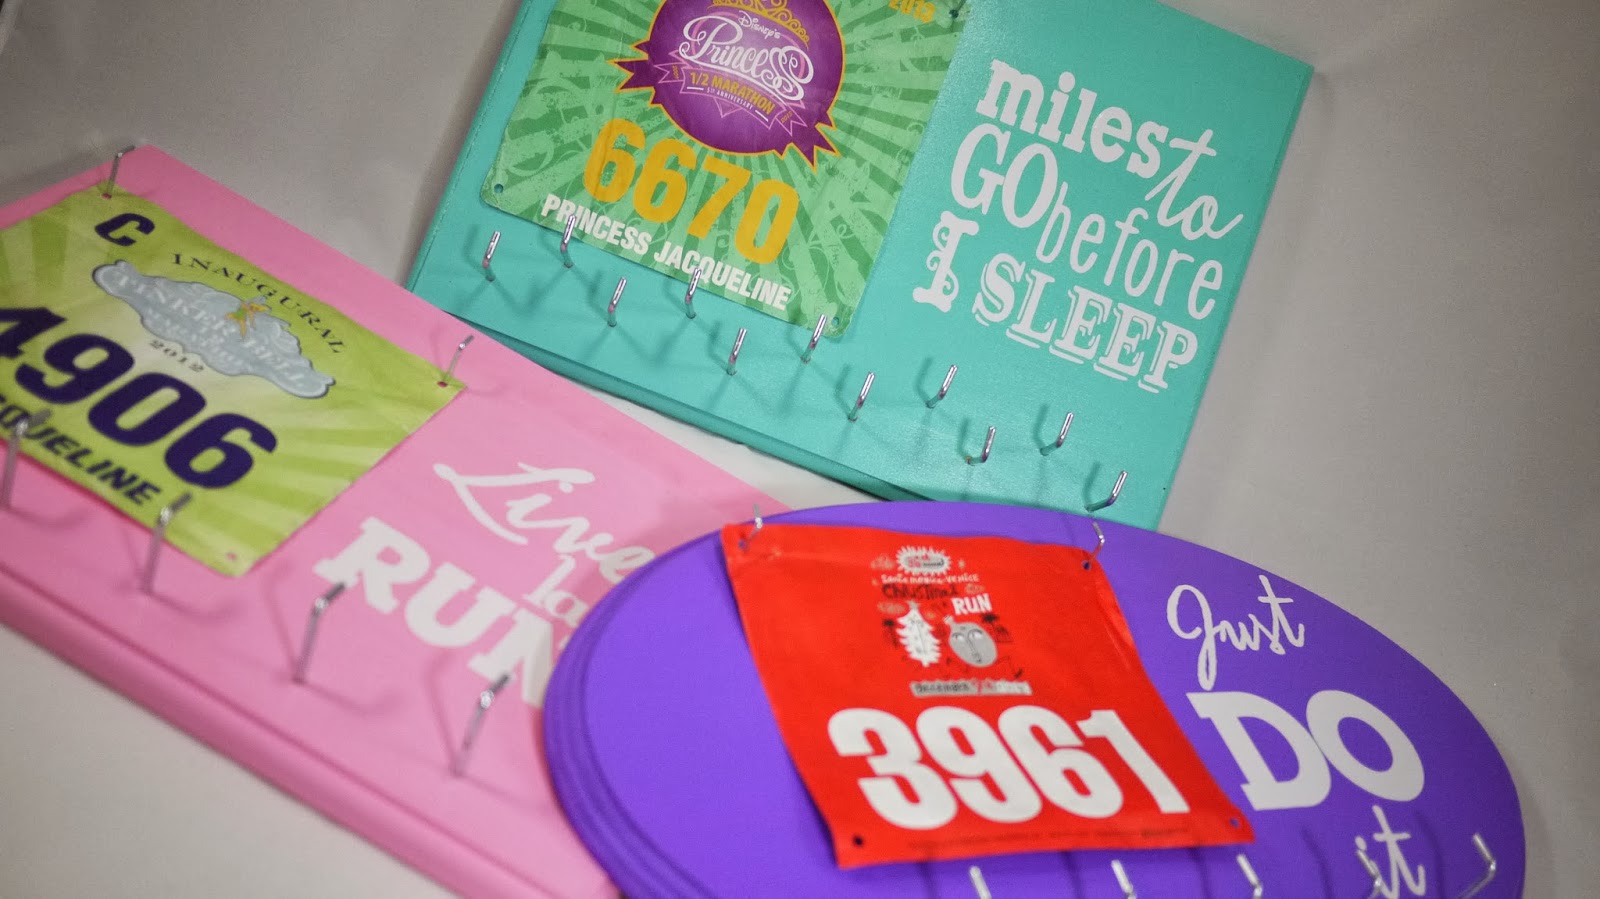


I love how the square hooks ended up being the perfect length to hold the medals--the ribbon lays flat and isn't bunched up.

Thursday, December 19, 2013

Baby Onesies

Last weekend I had a holiday party for some college sorority sisters, their spouses and little children. I wanted a cute gift to give to all the kids. I had some leftover onesies and toddler t-shirts from other projects, so I thought that I'd bring out the Cricut and iron-on vinyl sheets. They turned out super duper cute. Funny how while I was in college I was in charge of designing our sorority's t-shirts. Now, here I am 10 years later making my own homemade shirts for our kids...


More Christmas Cards

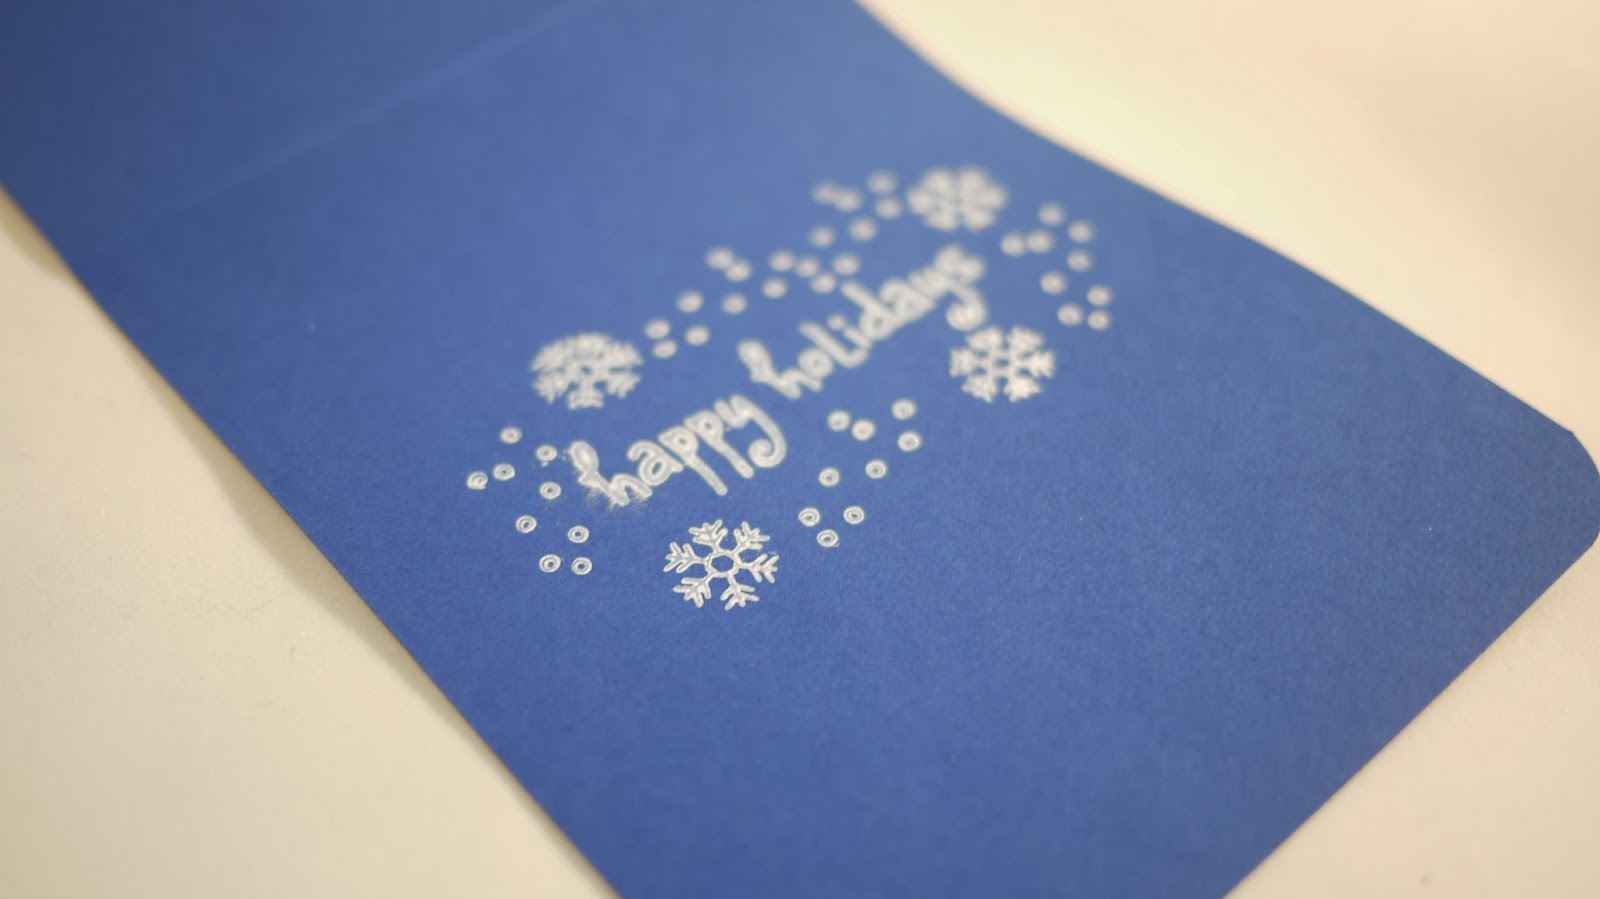
Here are a couple more Christmas cards I made for this holiday season. I had to use at least one of my stamps to try out my alcohol markers, so I picked one of the Penny Black stamps and created two different cards with two different color schemes. I love the pink and teal especially--not necessarily the colors you would think of for Christmas, but I think it totally works. I love the sentiment--only $1 at Michael's! The snowflake embossing folder is one of my favorites as well. The extra details are what really make a card, i.e. the glitter from Wink of Stella, Glossy accents for the eyes and nose, and Stickles glitter for the holly.


I couldn't let the beautiful backgrounds I created earlier with white embossed images and Perfect Pearls Mist go to waste, so I created these additional cards. I love the sophisticated look of the gray card, and the masculine nature of the blue card--making it perfect for a male recipient.


Christmas Tree Bow Topper and Marquee Light Garland

With all the traveling we've been doing over the last few years, and especially after our Germany trip, I decided to commemorate all the places we've seen with Christmas tree decorations. Decorating the tree hopefully in years to come will remind us of all the great travels. To go along with an international tree, I dreamt of creating or finding a tree skirt to fit the theme. The closest I came to one was from The Land of Nod:


I drove all the way to Orange county, but unfortunately in person the tree skirt looked a bit childish. I was back to square one, and I was a bit too tired to attempt to create my own tree skirt. Maybe next year--after I've taken up sewing, hehe. So I looked to other things to tie my tree together. 

First, I looked up how to create a ribbon tree topper on YouTube--Super easy! The wire floral glittered ribbon was from Joann's. I bought two spools each of the two colors, and I had barely enough leftover to make a teeny bow to coordinate with my front door wreath that I got from Costco.


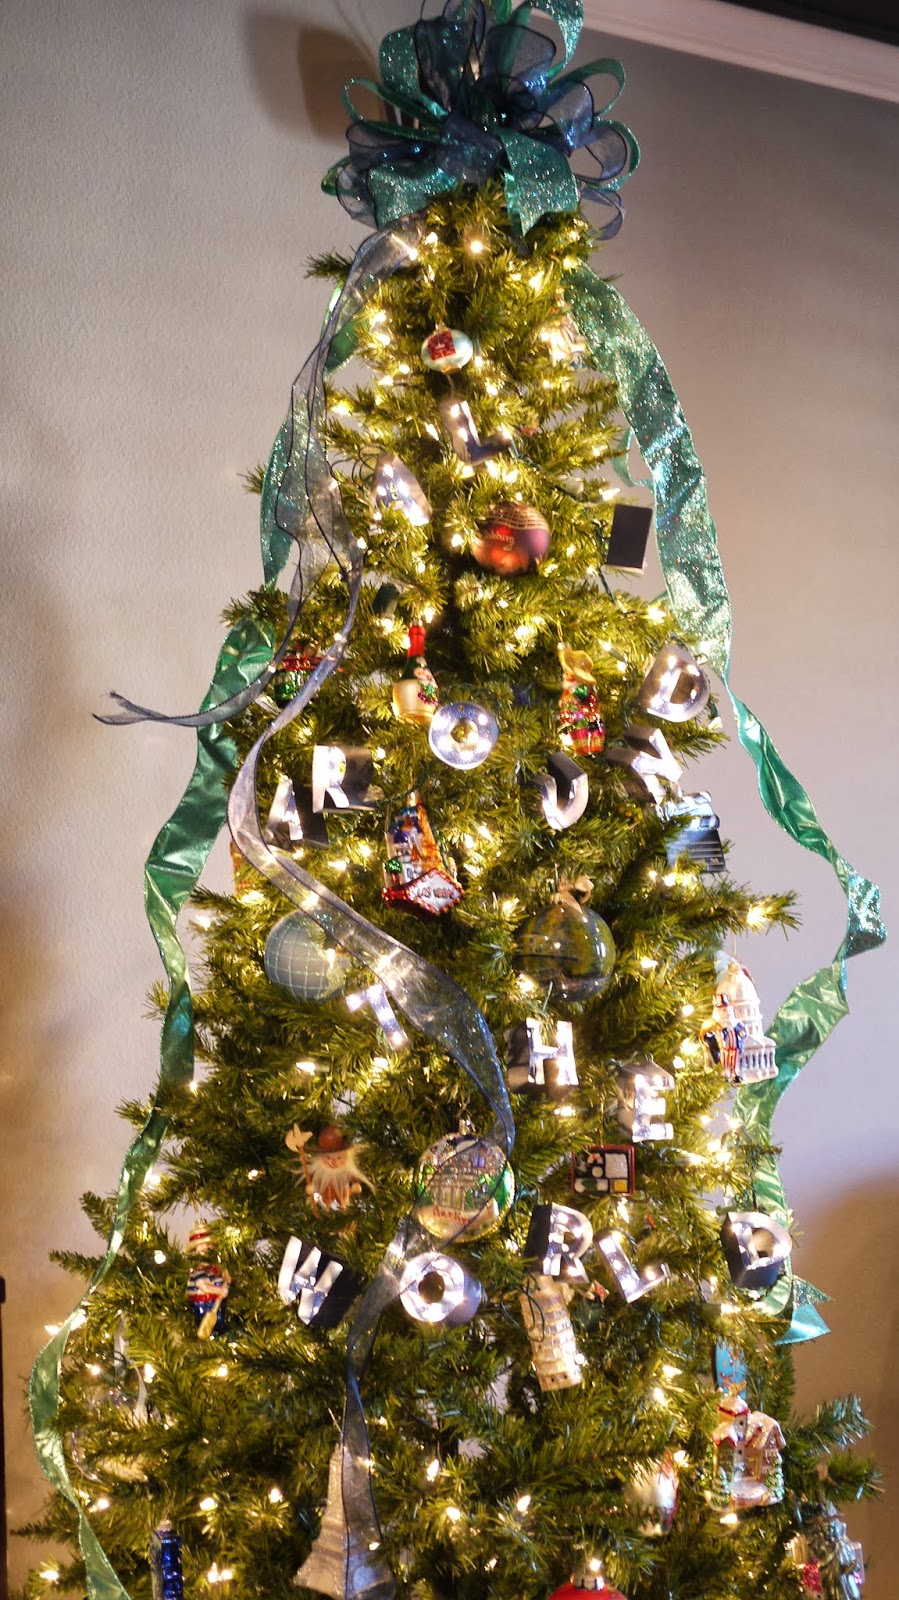
My next idea was to create a tree garland with the saying "All Around the World." I initally thought I would just cut letters with my Cricut and attach them to raffia or fishing wire, but I thought I'd look first to see what ideas were out there in the world of crafting. I came across this awesome post--and I knew I had to try it. WARNING: getting the lights to stay in the holes of the letters is a lot harder than it looks. But again, the end result makes it worth it.

Step 1:
Cut out 3 inch letters using Cricut and glittered cardstock. The simpler the font, the better.

Step 2:
Punch holes about an inch apart along the letters.


Step 3:
Cut 1 1/2 inch strips of cardstock. Run a small line of glue down the middle of each strip beginning at one side and wrap the strip around the letters, landing the letter right in the center of the paper strip. Continue around, until each letter is fully lined. Let dry. I used small binder clips at times to keep the edges together as the letters dried. 


Step 4: 
Carefully insert the lights through the holes and then display on your tree. If I were to do this again, I might have tried a smaller caliber hole punch, so that the lights fit snug in the hole and don't slip out. For some I actually tried scotchtaping the strand of lights to the back of the letters as a last resort. 


Loved the look of it against hardwood


Tah dah!! I love that great DIY ideas are available at just the tips of your fingers!!